About this deal
It’s essential to have a solid connection between a rafter and a top plate to ensure that your roof is stable. The gravitational forces on a roof cause the rafters to want to push outward. As such, it’s important to have rafters properly secured, so these forces don’t win out. Lastly, you’ll want to mark out the ridge beam in the same spots you’ve marked your top plate. I take the ridge beam and lay it on the top plate of one side of the wall, then mark the edge of the ridge beam just where I’ve marked the top plate. Make sure the top plate and ridge beam are aligned exactly. The Galvanised steel will ensure excellent resistance to corrosion when used outside in Pergola structures. Then use a measuring tape and measure from the furthest, top point of your first cut. Make a mark and use your speed square just as you did the first time. Cut the Birdsmouth Joint Unlike rafters, which are installed piece by piece, trusses are installed after they have been completely assembled. This means lifting and placing an object that can weigh hundreds of pounds depending on the size of the roof you are constructing.
You are going to cut out triangles that will cover the apex of each set of rafters. The rule of thumb is that the gusset should be twice the width of the wood you use for your rafters. So roughly 7 – 8” long for a 2×4. When to use common rafters? You can use common rafters on any shed roof, but they make the most sense when constructing a gable roof or lean to-type shed roof where they can sit on or attach to top plates of a wall. Lean-to rafters then connect to a ledger board against a wall of another shed or house. Hip Rafter
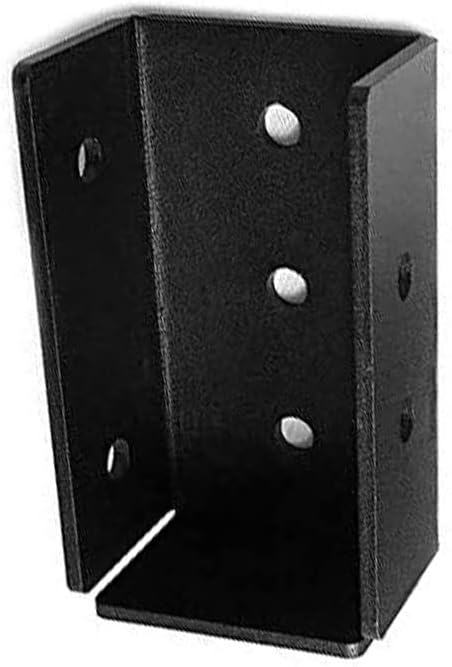
Framola™ Extra Strong Timber Rafter Bracket
Each side of the gusset will be 8” long, but only 8” tall. Layout your sheet of plywood on sawhorses. Facing the long side of your material, measure down from the top edge 8”. Then draw a line across the width of the plywood from that mark. Use a circular saw or jigsaw to make the cut.
Sandwich the short 2×4 between the longer ones. Screw them together. The short piece will sit in the exact center of one wall, right on top of the top plate. You can affix it with a couple of wood screws – it isn’t permanent, so it just needs to be able to hold the ridge board. Mark out where you are going to place your rafters. If you are doing 16” OC, then start ¾” in from the front edge of your top plate, where your first rafter is going to sit. From there, measure 16” down the top plate. Make another mark. Go until you get to the end. Lastly, if you live in a place with heavy, wet and regular snow, then consider your load. Consult the heavy load table, which has different values for lumber sizes, spans, and rafter spacing. How to Install Rafters on a Shed You’re in the middle of a build and it’s time to begin framing your shed roof. You know there are a variety of ways how to attach rafters and trusses to the top plate, but you aren’t sure which is best for your project.A hip rafter works in tandem with a common rafter, but when used, it creates a more visually appealing roofline but creates less interior space. Remember that for rafters, you’ll always use a ridge beam one size larger. So in our case, 2×6. If you use 2×6 lumber for rafters, your ridge beam will be 2×8. Determine the Pitch of the Rafters Let’s get down to business and build some rafters. Now that you’ve got a decent idea of how big your rafters are going to be, we’ll go through how to build them step by step. Remove the braces you made for the ridge board. Once out of the way, you can go ahead and install connectors on the ridge board. You’ll use the same type of connectors you used on the other rafters, except that you’ll cut one wing off – the one on the exterior shed side.
Thank you. Your instructions are clear and easy to understand. I also like that you included calculators and speed square use. I appreciate the time and effort you put into this so that us tyros have somewhere to go for good, useful information. We’ll be using a ridge beam for this project, so each set of rafters will meet a horizontal 2×6 at the apex, which will run the length of the shed and connect to all of the rafters. Also known as a “king common”, the king rafter is the center rafter between two hip rafters. It extends from the edge of the ridge beam down to the center of the wall, making it perpendicular to the common rafters. A king rafter has hip rafters jutting from either side of where they meet the ridge beam. Those single numbers correspond to the roof pitch. So since we are using a roof pitch of 4:12, we’ll use the number 4 in that row to help us make our miter cuts. Over the years I’ve had the opportunity to build quite a few shed roofs, and no two are ever the same. I’ve done simple gables, slant roofs and a few lean-to’s – and probably a few others I can’t quite recall. And of course, every time I build a new roof, I’m always learning how to build different types of shed rafters.
Installation Guidance for Infinity Galvanised Steel, Copper, and Zinc Guttering Top-Fix Rafter Brackets – for properties with no fascia board.
Do not install the ridge board to rafter connectors on the ends of the ridge beam yet – you will do this at the end. Make a Ridge Beam Brace Using an 8d nail, drive each nail in at about a 30-degree angle with a distance from the joint so that about 1/3 of the nail length goes into the rafter and the remaining 2/3 into the wall cap.
First, you’ll want to find the pitch of your rafters, which will help you find the length of your rafters. Use this calculator to find your rafter length. I use a jigsaw to make this cut, although a handsaw or circular saw works, too. If using a circular saw, you can make your cuts, flip the wood over, cut out from the other side, then use a finishing handsaw to remove the rest. Or you can just use a handsaw and cut slowly. When cutting the other end, be sure both cuts are parallel! If the length of the cut is 5’ 3 ½”, then you’ll be measuring only on one side from end to end. Using the miter saw, simply slide the wood through after you make your first cut. This ensures you keep the cuts parallel. Rafters typically use larger wood beams and do not have any sort of framework other than the beams themselves. A rafter beam is usually larger than a 2×4 – large homes may have rafters that are 2×12 or more! Introducing a NEW Aluminium Roof Trim - ideal for use on small flat roof extensions, garden rooms, office pods and sheds. A perfect high-quality, low-cost solution to the edging detail on your next small flat roof building project. Available as standard in three... read more What is the best canopy for a period property?
Downwards 10° / 100° Downwards 15° / 105° Downwards 20° / 110° Downwards 25° / 115° Downwards 30° / 120° Downwards 35° / 125° Downwards 40° / 130° Downwards 45° / 135° Downwards To start, I already know that my rafter length is going to be 5’ 3 ½”. I’ll use my speed square to measure my first cut on one end of my 2×4 rafter. I’ll use the corner of the speed square on one edge of the 2×4, where it says “pivot”. I’ll then rotate the square on the pivot until the 4 is lined up with the outside edge of the rafter. First of all, the notch creates more surface area in the connection between the top plate and rafter, allowing for a better connection for fastening the two together.
 Great Deal